Do-It-Yourself Acrylic Dividers – Phase 2

By now, you should have your 2 frames done up nicely and identical enough to proceed further.

And again, you will need some tools to aid you in the job.

Tools required to complete the divider

Tools required to complete the divider

1. Stainless Steel Mesh – Marine Grade, 40-60 microns or any other that you think is fine enough

2. Mesh Cutter – The length of cutting blade should not be any shorter than 50mm.

3. Silicon – Clear or Coloured as you desire but have to be aquarium-safe.  Do consult the seller if you are unsure, just in case you purchase the wrong type.

4. Silicon Applicator (Gun)

**Note: If you are just going to create 1 divider only and do not already have the Silicon Gun, you may want to purchase the “toothpaste” sized silicon sealant.

Step 1 – Sizing up the Mesh

If  the stainless steel mesh that you have purchase is way larger than required, you need to get it sized down.  The mesh should overlap on the frame by about 15-20mm larger on each side.  This is to ensure a sturdy hold of the mesh and that it should interact with the silicon.

Make sure the mesh is of the right size.

Make sure the mesh is of the right size.


You may want to place the frame underneath the stainless steel mesh so that you may check as you cut along and should you stray away, it would not be too far off.  Be careful not to be pricked by frayed mesh though.

Step 2 – Apply the Silicon

Now is the time to strip off the protective layer on ONE (1) side of the acrylic frame.  By now, you should have identified which side is going to be the inner side where the silicon and mesh is going to be.

Making sure that the surface is free from dust and tiny foreign objects (or acrylic bits), apply the silicon as illustrated.

Apply silicon around the frame before resting the mesh on it.

Apply silicon around the frame before resting the mesh on it.

Just be sure not to apply too near to the edges to avoid a messy situation later on.  By that, I mean, 10-15mm clearance.

And it should not be too thick.  As long as you have about 3mm thick of silicon, that will be good enough.

Trust me, it is not a nice feel to have silicon on your fingers and hands. Get some waste newspaper to wipe your hands on if that really happens.

Step 3 – Sandwich’em!

Place the mesh on frame the same way you sized up in Step 1.  The mesh should interact with the silicon as mentioned earlier on.

Next, place the other frame over it and sandwich the mesh carefully and slowly.  Make sure all the edges meet as perfectly as possible.

Press it down and squeeze out all the trapped air within and remove any excess silicon along the outer edges before leaving it to cure for 24 hours.

There you have it!! Custom made tank divider!!

There you have it!! Custom made tank divider!!


I hope this post has been helpful in serving as a reference to creating your own tank divider.  The next step is to get the air tubes to perform as insulation for installation.  I will blog the installation in the next post.

Do-It-Yourself Acrylic Dividers – Phase 1

Here’s the long awaited post that I guess most of you have been waiting for.  Hope you guys would be able to follow the guide and pull this off at home.

Phase 1 – The Frame 

It is important and essential to have the right tools for the right job.  Since it is a DIY panel, the tools needed are relatively easy and affordable to acquire.  The first phase is to get the acrylic frame done.

(You can get the custom-sized acrylic panels from Acrylic suppliers such as DAMA or Highland Import & Export.  These suppliers would be able to laser-cut the frames according to your specs as well but the prices would be quite exorbitant to begin with.  And that’s probably one good reason why you are still going to read the rest of the contents on this post.)

Let’s take a look at the materials and tools needed to get this job done smoothly and as perfect as we can.
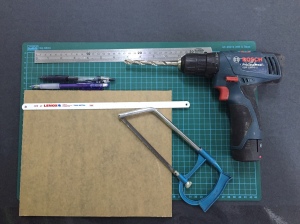
Tools required to get the frame done up.

Materials & Tools required to get the frame done up.

1. 2mm or 3mm thick Acrylic Panel cut to size minus 1mm to 1.5mm on the width. (2pcs to form 1 Divider)

2. Pen/Pencil

3. Ruler

4. Battery or Powered Hand Drill with drill bit meant for plastics/metal

5. Mini Hacksaw with a good sized blade

Before we proceed further, just be sure you have a sturdy “work bench” for the drilling and slicing job and that it allows you to clean up easily.  This is of utmost importance before you get thrown out of the house by your better half or parents for turning the house into a mill with the carpet/rug full of scraps.  Also, do not remove the protective layer that comes with the acrylic throughout this phase.

Otherwise, let’s begin!

Step 1 – Setting out the Frame

Once you have gotten your sized acrylic panel from your supplier, set out the thickness of the frame that you desire.  This can be in the range of 30-80mm thickness.  Do not try to be too adventurous and set out a frame of 20mm all round because you would either have a very flimsy divider or being unable to put the pieces together in Phase 2.

Mark out your frame thickness accordingly

Set out your frame thickness accordingly


Seriously, I do not think I need to elaborate too much how to mark out the lines here.

Step 2 – Perforation on the frame.

This is just the beginning of the dirty work that will follow through.  Using the Hand Drill with a drill bit of good size (between 9-15mm) or a hole-saw attachment (25-50mm), perforate the inner area that we do not need.  You may perforate the holes closely together or at about 50-100mm apart.  These perforations will help to ease the tedious arm workout that follows on next.

Drill some holes along the marked line

Drill some holes along the marked line

For aesthetics, do note that the holes should not cross the line although touching would be ideal, you just need to be careful not to overdo it.

The 4 corners of the inner area should have perforations done as well.

**NOTE: Be careful not to crack the acrylic panel.  Remove the drill bit gently with a light squeeze on the trigger so that the drill bit do not get caught in the hole.

Step 3 – Saw it off like a MAN!!

And I do not mean the ‘Schlong’ (sorry for the language used).  Pump up your muscles and work those arms!!  It’s time to cut along the perforated line, except that this time round, you are not doing it with a pair of scissors but a handy blade from the mini hacksaw.  Remove the blade from the mini hacksaw.  Wrap one end of the blade with an unwanted cloth or a page from your favourite magazine to perform as a make-shift handle.  If the blade is too long and flimsy, wrap around the area where it works for you.

Insert the cutting end into any of the perforations created earlier on, start slow and steady to get a good feel on creating a perfect cut-line on the lines set out in Step 1.

Making sure the holes are big enough for the blade.

Make sure the holes are big enough for the blade.


Remember, you need to create 2 identical frames so precision is critical over here.  If this sounds like a game to you, the next perforation is your “rest station”.  Do not, I repeat, DO NOT stop mid-way as you may face some problems starting on that same edge again.  Also, try not to reverse your cutting direction in the hope that the blade will meet the same point in the previous cut.  Likely, it will not be a perfect job done.

This blade is preferred but the holes need to be bigger

This blade is preferred but the holes need to be bigger


Step 4 – Finishing it Off.

Actually, if you had done it perfectly and nicely enough, there isn’t much to talk about here.
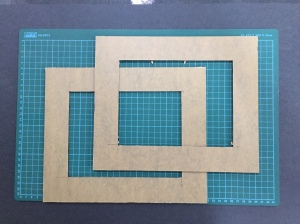
The frames should look like this when completed.

The frames should look like this when completed.

The KEYWORD here is PERFECTLY.  It will definitely be worth the effort to be slow and steady in Step 3 so that Step 4 is just admiring the frames created by your OWN HANDS!!

But well… If that is not you, do not be disheartened.  You are part of the majority. Furthermore, there will always be a solution to every problems created.

Use a flat metal file and file off those unwanted kinks.  Once you have gotten rid of the kinks, you may file the entire length in long strokes from end to end to smooth it out perfectly as if they were done by a laser-cutting machine.

**Note: Just in case you need to know.  To be sure you have 2 identical frames, place the 2 frames together with all edges/corners meeting at the same point, do a visual check.

1. Do the inner sides of the frames meet at the same level when the 4 external corners meet?

If the lines/sides do not meet at the same level, you may want to refine them before proceeding to Phase 2.

Then there you have it, a perfect looking frame!  A job well done!!

A New Year, A New Way To Blog!

Happy New Year 2015 to all my readers/followers!!

2014 has been an eventful year for me, though most of it is non-shrimp related, if that would explain my lack of presence online.

During this time of silence, I have received alot of emails from you guys asking me how I have been and urge me to update more in my blog with interesting articles/ write-up.  Really appreciate the encouragements and compliments received as well.  Thank you guys (and ladies, if any, raise your hands?)

Well, work and family has been draining my life away for the past 1 year though not all is bad.  It’s just that I lacked the energy and brain cells to come up with topics to write on.  For this year, I hope to be able to try a new way to blog which may be more regular though they may also be short articles.

In order for this to work, I would require help from my readers and followers.  Haha… Nothing much actually but am thinking that you guys could probably provide me with ideas or topics that are less talked about, or perhaps just a query on your mind that needed some answers (some of you have already been doing this) and I will post my replies on the blog, or via email if similar topics have been raised before.

The idea of having this blog is to help me share what I have learnt and experienced with new enthusiasts and hobbyists alike anyway.  Do not worry if you think what you are asking is too “noobish”, nobody/nothing is. (IMHO)  Seriously speaking, I may also not have all the answers on my finger-tips right on, but I will find the answers for you so that I too will learn from it!! Great idea?

So please keep your emails/comments coming via contact page.  Thanks and have a fanta-bulous 2015 ahead!!

**FYI.  I will be conducting a tank reset pretty soon and will definitely blog it, hope to do it better than my previous!

A Very Sad Case of Ill-Treatment

This post is not so much related to Shrimps but regarding my recent sale of self-grown Mini Pelia in local forums in a bid to clear off some space for my shrimps.  Afterall, my focus in this hobby goes to the shrimps and not plants.  When I see more of plants rather than shrimps, I would think the only sensible thing to do would be to “harvest” the plants so that I would be able to admire more shrimps and ease my culling process.

After posting my sale in a couple of local forums for aquatic plants enthusiasts, I was contacted by this brother who wishes to purchase 2 portions of the plant on sale.  Initially, I did not realise until he had informed that he had actually purchased Mini Pelia in an earlier sale a few months back.  During the conversation, he had also blatantly informed that he had thrown away his previous purchase as there were some snails crawling out in the bag of plants 3 weeks after the purchase, meaning he left the plants in the bags and floating somewhere for that period of time.  During that sale, he was also informed the tank that the plants were grown in do have snails but as much as possible would be removed.  Instant thought that came to my mind, there are better ways to quarantine plants bought and products available in LFS to effectively clear off snails or pests, but to each his own and let’s not judge too quickly.

I then carried on to assure him that I would clear off the snails from the plants prior his collection if he is alright with it and that if he had found any snails, I would gladly refund him with no questions asked.  In fact, the Mini Pelia sold to him were the greenest and taken from the tank that visibly do not have any snails in.  If that was not enough, I went on to scrutinise and did all I can do within that short frame of time to ensure these 2 portions were snail-free.  Noting also, the condition of the plants when sold to him were bright green, healthy without foul smell and chilled. This brother came, took a quick glance and paid all too quickly during collection.  I even offered that he scrutinise the plants before he leave with no obligations to purchase.  Understanding that he had once been “haunted” by snails, I had also told him about the different products available in the LFS that are effective in clearing such pests.

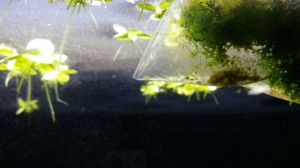
Photo sent by the Buyer, showing the snails in the creeping out from the plants.

Photo sent by the Buyer, showing the snails in the creeping out from the plants.


2 Weeks passed and received a text message from this brother with no words written except for an attached image of the bag of plants with a tiny baby snail.  As soon as I had seen the photo, I felt bad and asked him if he wanna bring it back so that I can do a refund for him.  He seems perfectly alright with the arrangement and all that was needing of him was to arrange a time with me appropriately to carry out the refund. The arrangement did not come until about 2:30pm on a Sunday to carry out the refund between 3:15pm to 3:30pm, in the form of a text message.  As I was busy with my kids on Sunday, I missed the message and managed to reply only at about 4:18pm.  We arranged to meet before 7pm since he needs to go for a swim at this time.

When he arrived at my door step, he apologised that he had to refund and I was also as apologetic since the plants did still have pests eventually.  However, as soon as I received the bag of plants from him, the bag felt warm.  I thought that was alright.  He went on to tell me that the plants turned slightly brownish since they were in the bags and floating in his tank for 2 weeks.  Immediately, I refunded him the amount that he had paid and bid him farewell. Upon further scrutiny, the water in the bag was very warm and the plants looked cooked instead of brownish.  Not only that, they gave out a very foul smell.

Relating back to his message earlier on, I thought that he could have left the 2 bags of plants in his car parked under the sun for hours while he carried on with his activities!!  Gosh… Immediately I texted him to verify if he had indeed done so and the reply from him was simply “Pai seh.  Thanks”.  I’m not sure why he would do that as a hobbyist that is so particular about pests in his tank.  I would think that he loves plants so much to be commit such a terrible mistake.  I’m not even sure now if he had done that on purpose as his replies after that were not apologetic at all until I asked if he would do that to plants that he had newly bought.  His attitude towards these plants in my opinion were too much to be accepted.

Is this how a decent hobbyist ought to treat newly bought plants?

Is this how a decent hobbyist ought to treat newly bought plants?

The Mini Pelia in its worst condition.

The Mini Pelia in its worst condition.


Anyway, this post is not about me bitching but to drive a point, how sad it can be when you know there are “hobbyists” or “enthusiasts” out there that possess this kind of irresponsible attitude “Who cares about the condition of the plants since they are not going to be mine”.  If you really do love your hobby and plants, never ever harm them like this.  It really made me think that this was done on purpose since he will be getting his refunds and would have nothing to do with them thereafter.

Just some Shrimp Pics

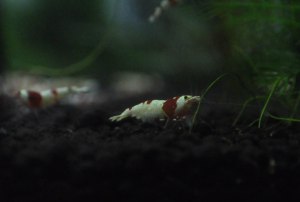
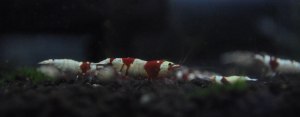
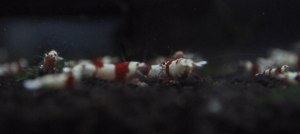
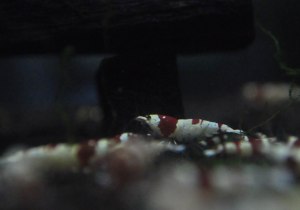
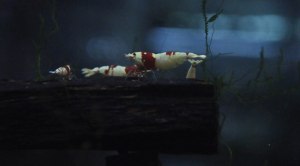
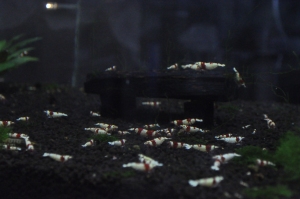
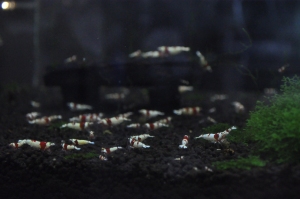
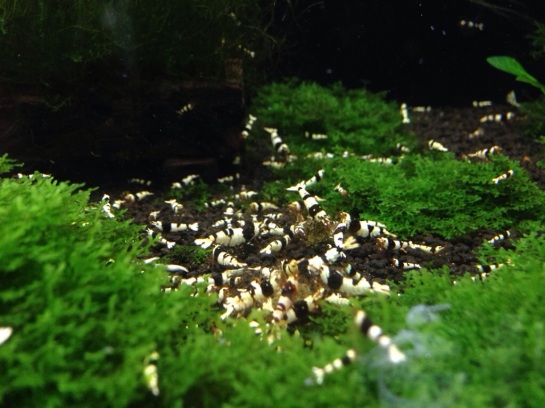
Just managed to squeeze some time out of my busy schedule to snap some quick pics of my shrimps with DSLR, however, Pinto and PRL shrimps are not very co-operative.

Pardon my poor photography skills though.  Shall try to update with more photos regularly.

21 20 19 18 17 16 14 13 12 11 10 9 8 7 6 5 4 3 2 1

The New Residents have ARRIVED!!

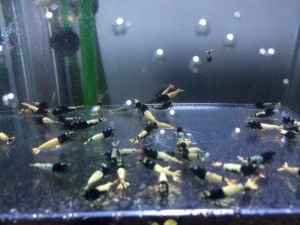
Just picked up the newly arrived Pinto shrimps (Japan Line) from Aquarist Chamber last evening.  They are the new residents occupying the top tank which I had commissioned earlier this year in preparation for their arrival.

Just to note, I have gotten only the black Pinto for now, trying to breed them successfully first before venturing deeper.


Pintos just arrived at Aquarist Chamber

Pintos just arrived at Aquarist Chamber

Mix of Red and Black Pintos at Aquarist Chamber

Mix of Red and Black Pintos at Aquarist Chamber

My way of enjoying this hobby now?

Breed the shrimps, starting  in small numbers yet growing steadily.  Fine-tune water parameters to obtain ideal breeding environment.

Pinto acclimatizing in satellite tank

Pinto acclimatizing in satellite tank


Pintos scrambling around in satellite tank. Signs of anxiety.

Pintos scrambling around in satellite tank. Signs of anxiety.

IMG_8447

IMG_8445

I’m hoping to see these shrimps prosper in numbers in the very near future as the sizes I had picked are near maturity.  I have picked 3 males and 3 females, or so I think, since they are still juveniles.  I’m just hoping my picks are correct, if not more females.

Compared to the usual CRS PRL, Pinto possesses more qualities and features for selections which makes the selection for grading/breeding all the more tougher.  However, Pinto sold in Singapore are often not graded in great details, unless a certain level of a particular trait or feature is achieved.  We are still very much dependent and influenced by “Shrimp Trends” happening in Japan, Taiwan and Germany though.

Shall update more when they have matured.  Meanwhile, enjoy the pictures.

IMG_8452IMG_8455 IMG_8460 IMG_8461


IMG_8462

IMG_8467IMG_8466


The GSS is here!!

The Great Singapore Sale 2014 is just round the corner!! The Great Shrimp Sale is here!!

To appreciate all who have been following my blog, the first 5 readers to text “I want GSS” to 96443173, will be able purchase either 20 pieces of Normal Grade PBL at $220 OR High Grade PBL at $60/piece (minimum 5 pieces).

A little story about my colony of PBL here:

The current breeding colony startED with just 20 pieces of High Grade PBL in my tank. Somehow, because one of the newly transferred plant was shedding its leaves (escalating the Ammonia & Nitrates level to such a high level), the PBL dropped like flies over span of 2 weeks.

Fortunately, the vicious cycle stopped when the population dropped to just 8 miserable shrimps of mixed gender. From then on, the population grew more steadily and within a span of 3 months, the population grew to 50 pieces!! What happened was, the only 3 female shrimps were berried constantly and almost immediately after releasing each batch of shrimplets from their egg pouches!And after 9 months, my tank was filled with hundreds of them!!

So where did the Normal Grade shrimps come from since I had only High Grade PBL?

Well, as the population grew, I had to ensure that they breed in the correct environment and that the offsprings are of decent quality. Thus, those that did not make it pass my criteria set are simply transferred into another tank as culls.

Thus, these Normal Grade PBL of mine are probably one of the best looking Normal Grades around!! (Ermmm….. Sounds exaggerated??)

Well, come see for yourselves!!

Able to determine which photograph is showing High Grades & which is showing Normal Grades between the 2 photographs here?

20140523-225545-82545792.jpg

20140523-225838-82718074.jpg

Grab them before they’re all gone!!
The New Arrival!! SSS & SS Grade Asuka-Ebi!!
This evening, while on the way home, I got a call from Alvin from Aquarist Chamber with this message, “Bro, are you free now? The shrimps are here.”

My eyes glistened instantly and I made a U-turn to Aquarist Chamber. The atmosphere was totally different with Mr Kenji Tsunematsu and his shrimps in the shop!

After saying all the Hi’s, Alvin brought me over to the tank where the SSS grade shrimps are at. The shrimps had just arrived that afternoon and the colours are still recovering, but the colours are already very brilliant!!

20140224-004936.jpg

20140224-004957.jpg

The next highlight, SS grade Asuka-Ebi shrimps are just as tempting!! My initial order was supposed to be just 4 pieces of SSS grade shrimps and I ended up with an additional 4 pieces of SS grade shrimps!

20140224-004757.jpg
There are many other PRL bloodlines that arrived today as well. Here are some pics of the shrimps.

20140224-004729.jpg

20140224-004347.jpg

20140224-010130.jpg

20140224-004238.jpg

They are all very fine specimen of PRL shrimps!! So head on down to Aquarist Chamber and net some home!

And here are the shrimps that I have net home today:

SSS Asuka-Ebi

20140224-010841.jpg

20140224-010934.jpg

20140224-010757.jpg

20140224-010817.jpg

20140224-010829.jpg

20140224-010903.jpg

20140224-010921.jpg

20140224-011308.jpg

20140224-011318.jpg

20140224-011334.jpg

SS Asuka-Ebi:

20140224-011149.jpg

20140224-011203.jpg

20140224-011215.jpg

20140224-011226.jpg

Just glad to be the first to select and net these shrimps home. And as always, May the shrimps breed and bloom in my tank!!

Multiply shrimps multiply!

The Latest Shrimp Craze in TOWN!!

Just thought I should post something about the latest shrimp craze, for those who may not have heard or read about it yet.

They are, perhaps, one of the easiest breed of shrimps to keep.  All you need to know is just the fundamentals of keeping water and feeding routine.

And here they are….

Seed Shrimps aka "Sesame Street" Shrimps

Seed Shrimps aka “Sesame Street” Shrimps

The Seed Shrimps!! Perhaps one of the smallest and easiest to keep shrimps…. They are so easy to keep that you probably do not want them to start breeding in your tank!! LOL!!

Anyway, that’s not the real craze…  The real craze will start on 24 February 2014, from 3pm onwards!!

Lowkeys’ Boss, Mr Kenji Tsunematsu will be conducting a workshop at Aquarist Chamber afterwhich, he will also be imparting the knowledge and tips to shrimps selection!!

That’s totally to the benefits of shrimp hobbyists!!   For more info, contact Alvin from Aquarist Chamber.

And I have emptied one of my tanks in preparation to bring in SSS PRLs.

Tank emptied for the "Occasion"

Tank emptied for the “Occasion”

They shall be my new addition to the racks, the Asuka-Ebi SSS Grades.  Can’t wait to see them in my tank…

Making Way for New Shrimps

Clearing another tank of SS PRLs to make way for SSS JPRLs.

20140220-010215.jpg

An estimated count reveals more than 60 shrimps and shrimplets in the plastic tub!

And a crazy thought came to my mind… Would anyone buy this tub of shrimps for $1000? It would be quite a steal!! This small little tub of shrimps is worth more than $5000!!

In any way, I’m clearing away some of my shrimps so if there are anyone keen to buy them over, feel free to contact me!

With the shrimps removed, I would be able to re-do some scaping and planting next. Time to do some shopping for plants!!